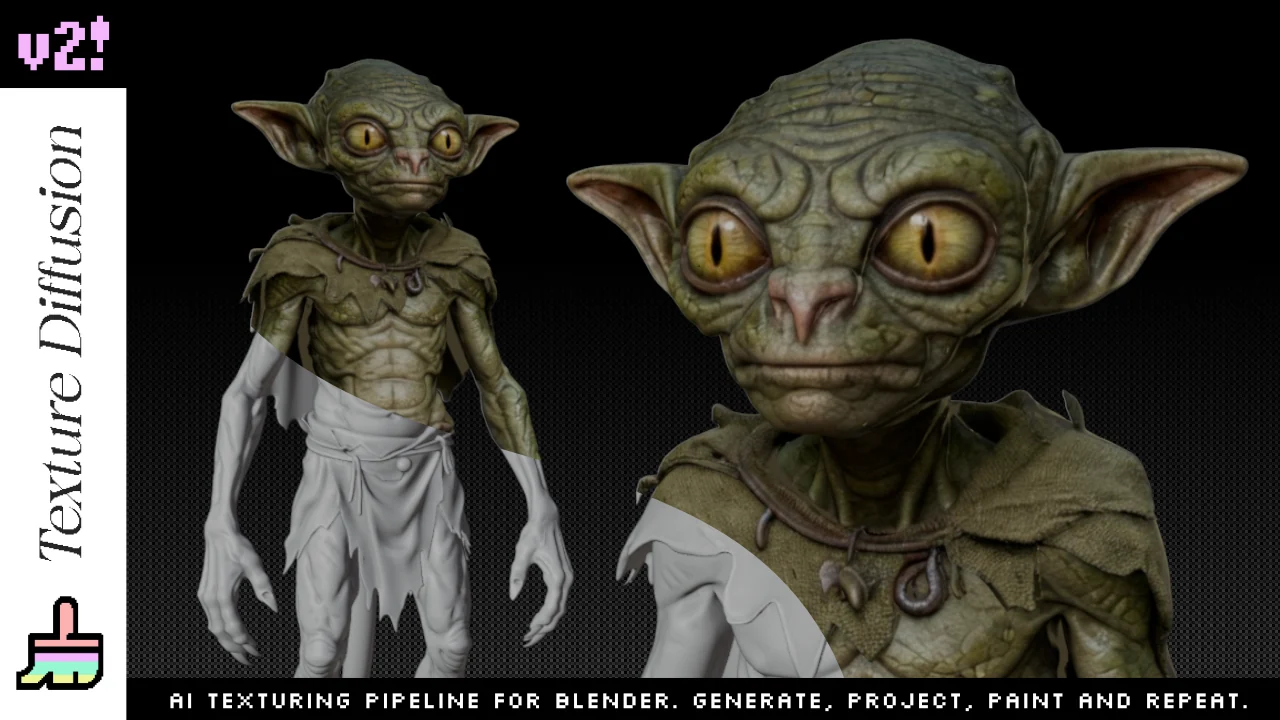
Texture Diffusion v2
A Blender addon for AI-assisted texturing, built around projection, painting and iteration.
Texture Diffusion v2 is a Blender addon for AI-assisted texturing.
It takes a capture from your Blender viewport, sends it to a cloud image model, then projects the generated texture back onto your mesh. You can use it for a full-object texture pass, or paint generated details directly onto the model with Blender’s stencil brush.
I built it because I wanted AI texturing to stay in Blender, without constant imports and exports, but also because I wanted control: choosing the view, adjusting the projection, painting details by hand, and deciding what stays.
Demo videos
Start with the short version if you only want to see the idea in motion.
The longer demo shows the actual workflow: generation, projection, painting and refinement.
Part 1 - The Generate panel
Both workflows go through the same Generate panel. This is where you pick the model, frame what gets captured from the viewport, and build the prompt.
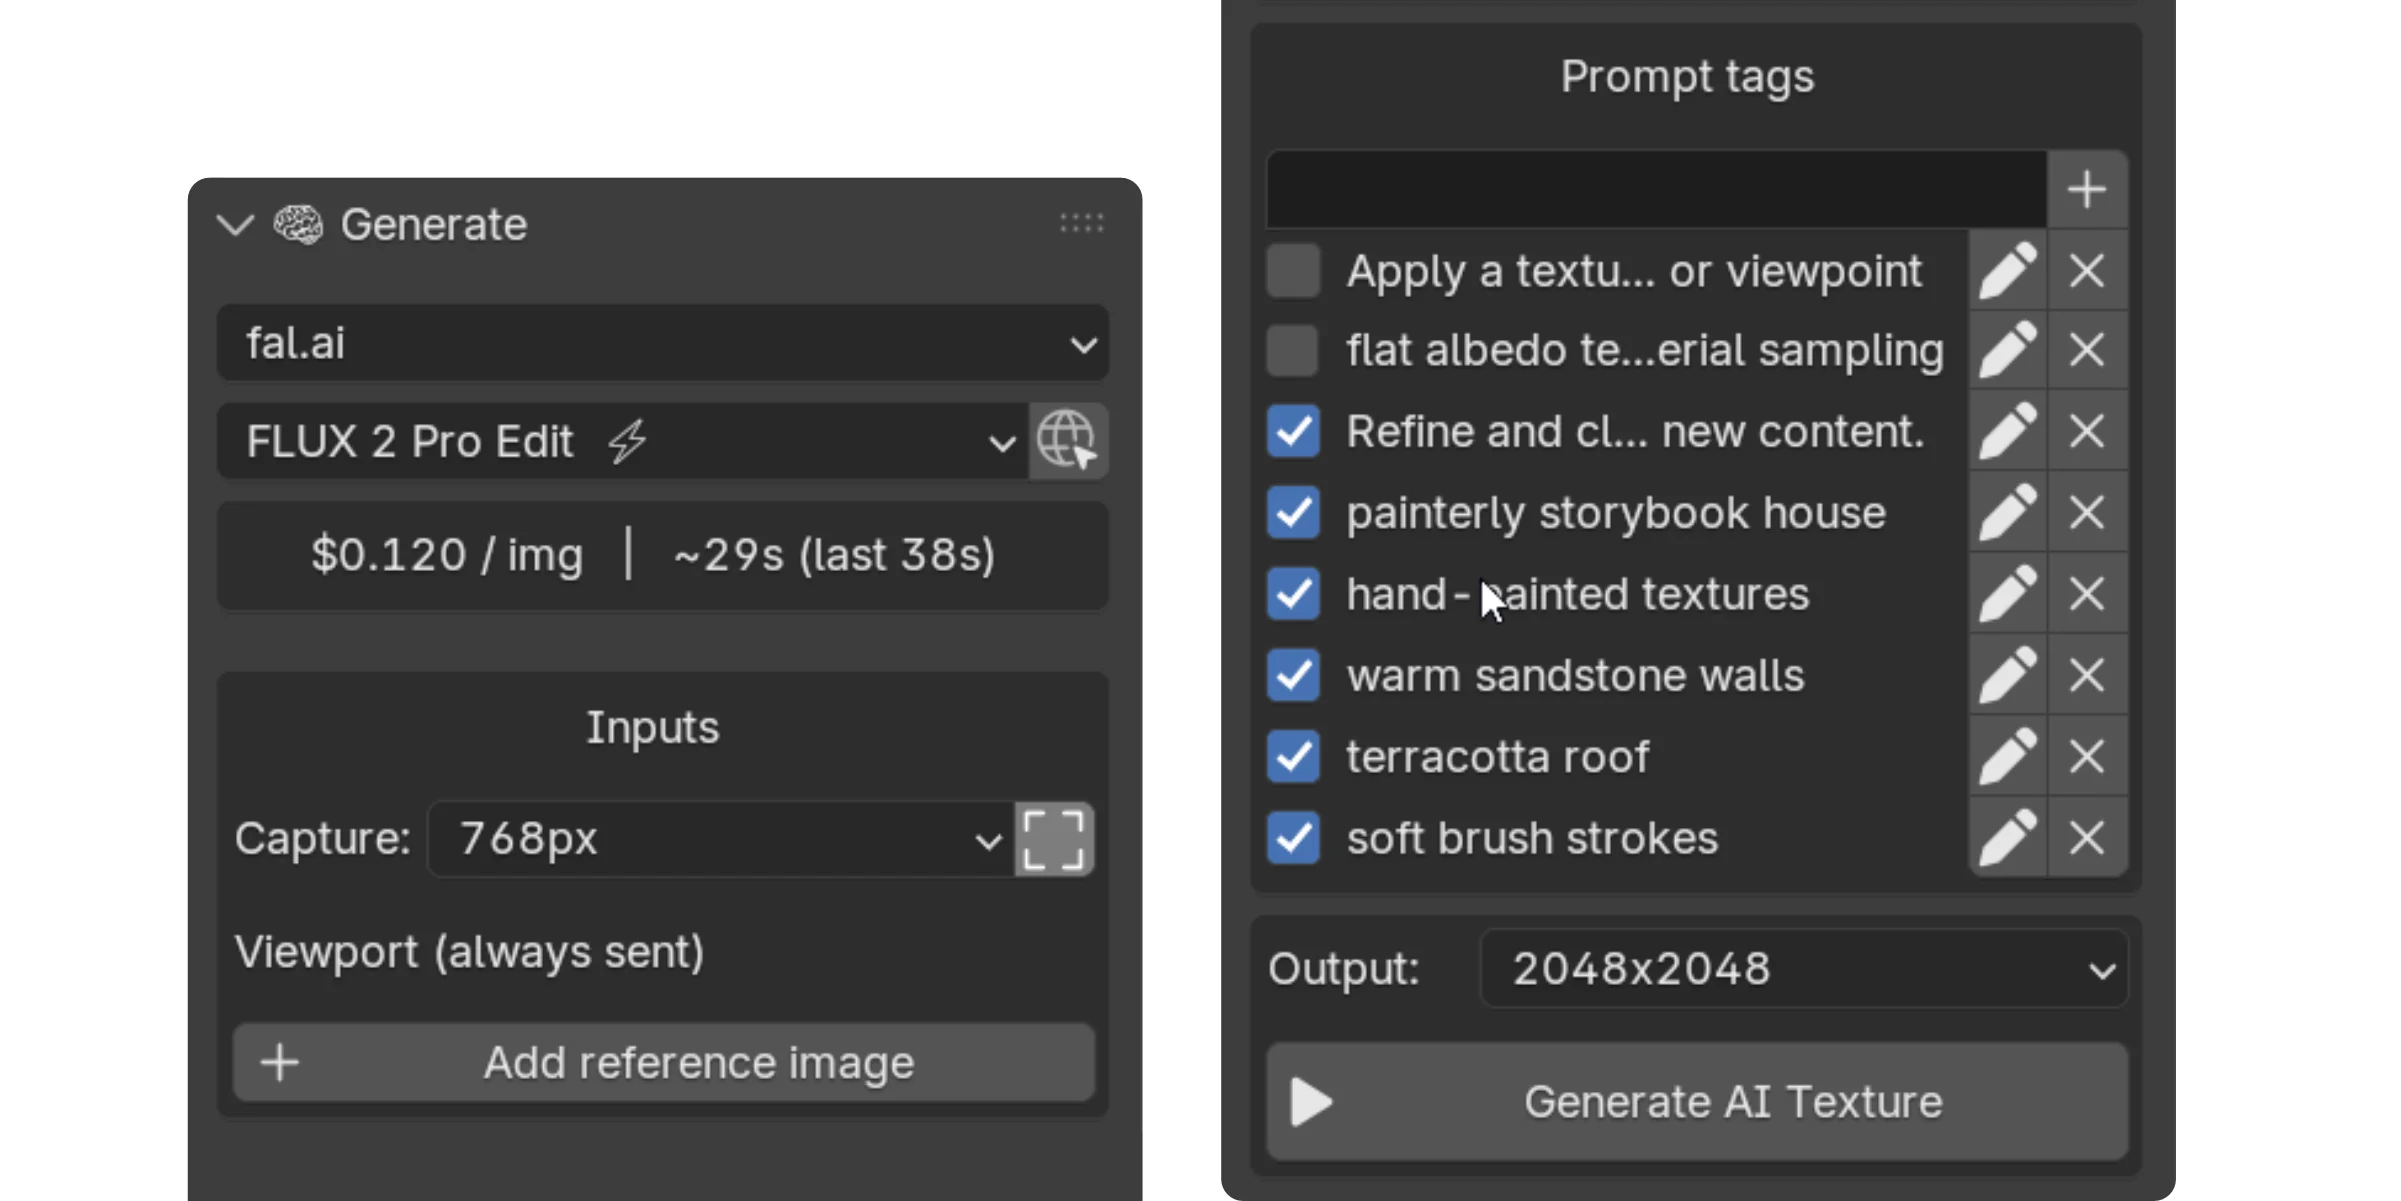
Provider and model
Pick one of three providers: fal.ai, Replicate or Google Gemini. Then pick a model in the filtered list.
Each entry is tagged with quick indicators for speed, cost and quality, and the panel shows the price per image and the average generation time. Most generations land between $0.02 and $0.16 and take 8 to 75 seconds, depending on the model.
Inputs
The Inputs box shows exactly what the model receives.
Capture sets the size of the square crop taken from the viewport. The toggle next to it shows or hides a yellow frame in the 3D view, marking the exact area sent to the provider. The shortcut is F7.
Some models also accept reference images. When they do, a picker appears in the input box.
Prompt tags
Instead of editing a long prompt every time, you can build a list of small tags and toggle them on or off.
In Live Paint mode this becomes a real workflow tool: as you orbit the model, you can switch on the right keywords for the part you are about to texture, then switch them off when you move on. The prompt stays aligned with the viewport.
Part 2 - Live Paint Mode
Live Paint is for adding details to a specific area: a face, a panel of armor, a door, a piece of fabric, a small prop detail.
You frame what you want, generate, then paint.
Prerequisites: the object must have UVs and applied transforms.
1. Frame
Toggle the yellow capture frame with F7 and place the area you want to texture inside it.
Whatever sits in the frame is what the AI will see.
2. Generate
Write your prompt, toggle the relevant tags, then press F6 or click Generate AI Texture.
The result appears below the button.
3. Paint
Click Start Live Paint. Blender switches to Texture Paint with the stencil brush active, and the generated image loaded as the stencil texture.
Do not move the camera before painting. The projection is aligned to the view you generated from.
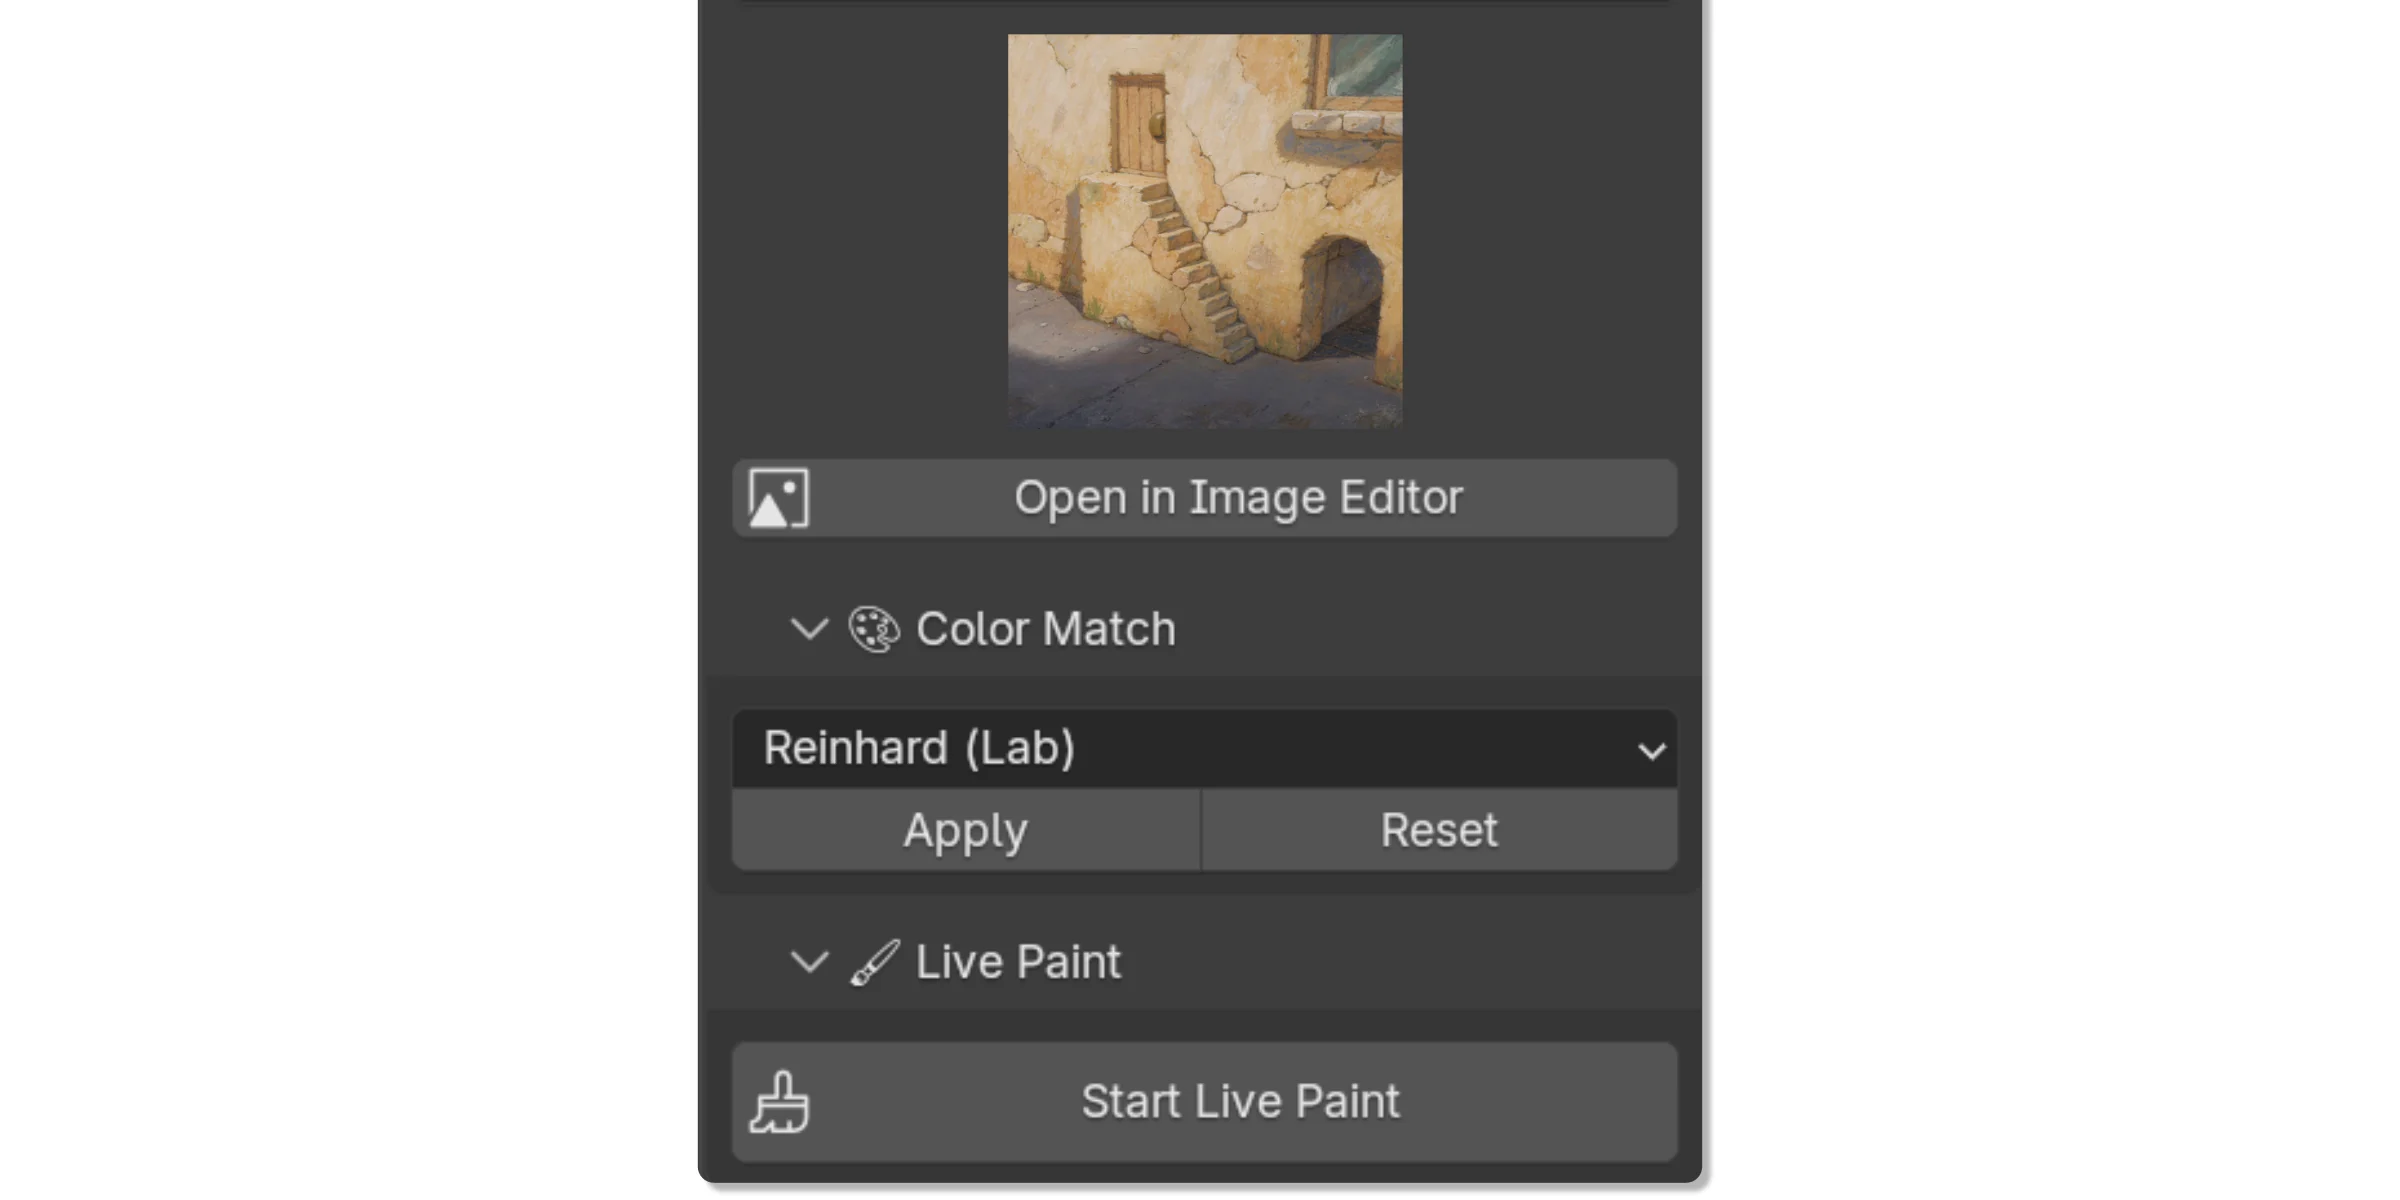
Color Match
If the generation’s colors clash with the existing material, open Color Match, pick an algorithm, then click Apply.
It is not always perfect, but it often helps the generated image sit better in the current viewport palette.
Part 3 - Global Texture Mode
Global Texture is a guided pipeline for texturing the whole object in one pass.
The workflow is split into five steps, visible in the same panel, so you can step back and re-adjust when needed.
Prerequisites: the object must have UVs and applied transforms.
Step 1. Setup the projection scene
Click Setup Projection Scene. A new scene opens with a single camera.
Place duplicates of your object at the angles you want to texture, usually front, three-quarter, side and back. The goal is to cover every important part of the surface while keeping the silhouettes readable.
A few rules matter:
- maximize surface coverage
- keep each view readable
- respect Blender’s UV cap: 7 views, or 3 with Symmetry X
- for symmetry, the object must be cleanly symmetrical on the X axis
Why a single frame
Most AI texturing tools place several cameras around the object, generate each view separately, then try to stitch the results.
Texture Diffusion does the opposite: it packs every angle into one camera frame. The AI sees the whole object in one shot, which helps the generated texture stay coherent across viewpoints.
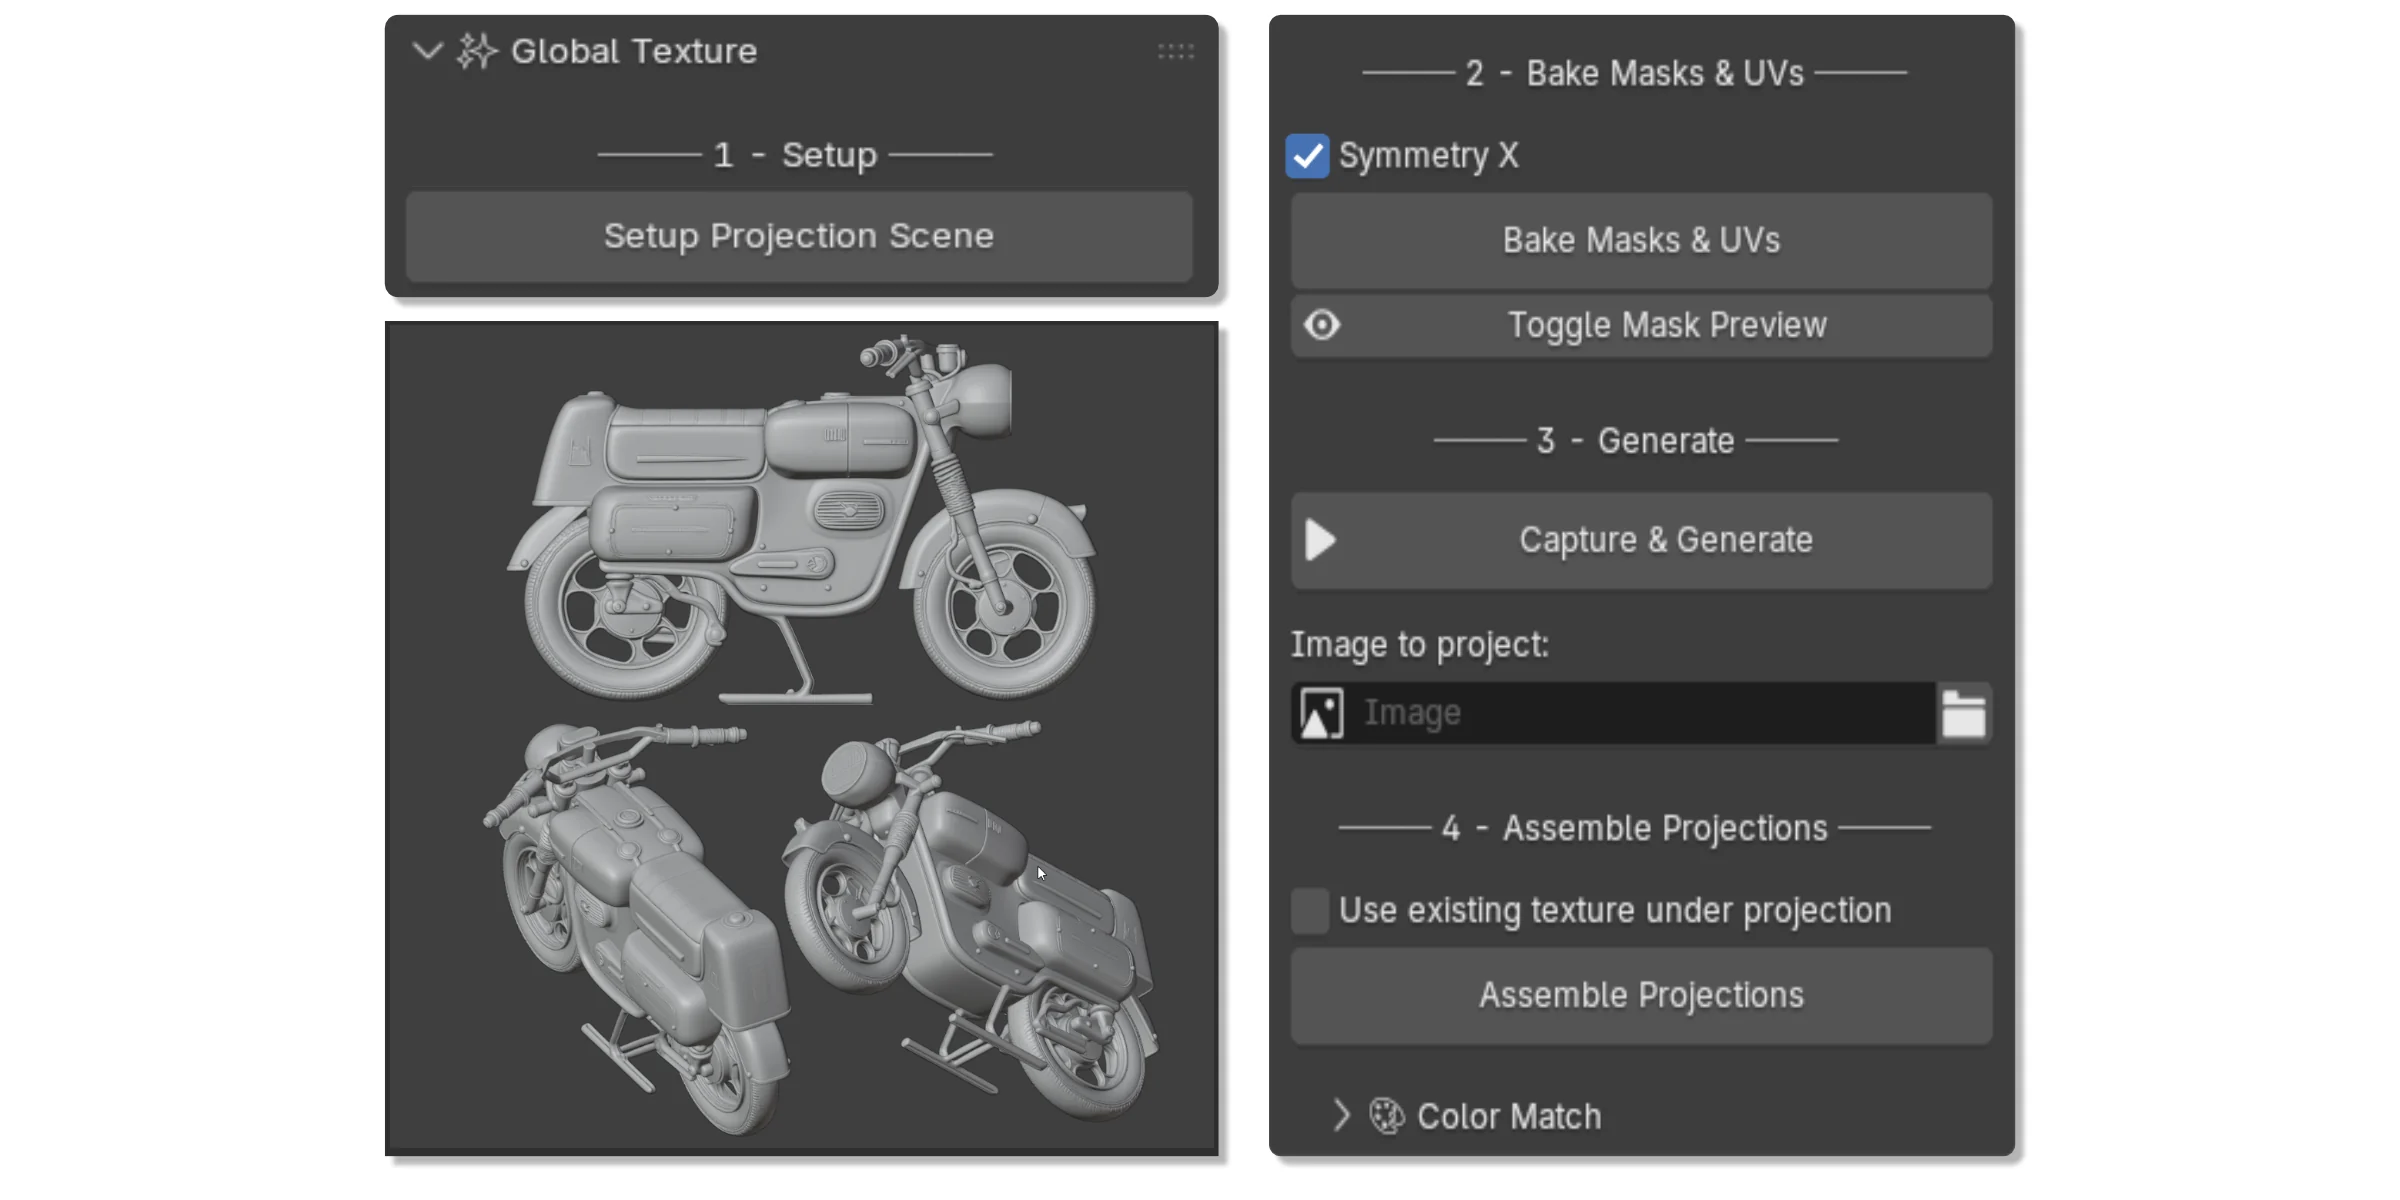
Step 2. Bake masks and UVs
One click bakes two things:
- per-view masks that tell the assembly which part of the object each viewpoint covers
- a camera-projection UV map that ties the generated image back to the surface
The Symmetry X toggle bakes mirrored masks for symmetrical objects. Toggle Mask Preview lets you inspect the masks on the projection scene any time.
Step 3. Capture and generate
The Generate button now runs from the projection scene’s camera view.
What comes back is a single image holding every viewpoint, ready to be projected. Color Match is available here too if you want to pre-align the generation with an existing base texture.
Step 4. Assemble the projections
Before assembly, an optional toggle lets you use the existing texture under projection, so the new generation layers on top instead of replacing it.
Click Assemble Projections. The addon creates an assembly scene with three collections.
Final
The final object shows the combined texture from every projection, blended through a shader setup. This is what gets baked in Step 5.
Breakdown
One object per viewpoint, each showing its slice of the generation.
Click any of them and the panel reveals per-view parameters: custom mask intensity, edge fade size and mirror on/off. You can also paint a custom mask directly on a view to hide a glitch and let the layer underneath show through.
Tweak
The Tweak collection contains working copies of each viewpoint with the generated image projected via camera mapping.
Click an object, press Edit Tweak, and you enter Edit Mode. Moving the mesh makes it slide on the generated image. Once the geometry lines up, press Transfer Tweak: the addon recomputes the final object’s UVs so the projection lands where you adjusted it.
The geometry of your final model is never changed. Only the projection alignment is transferred.
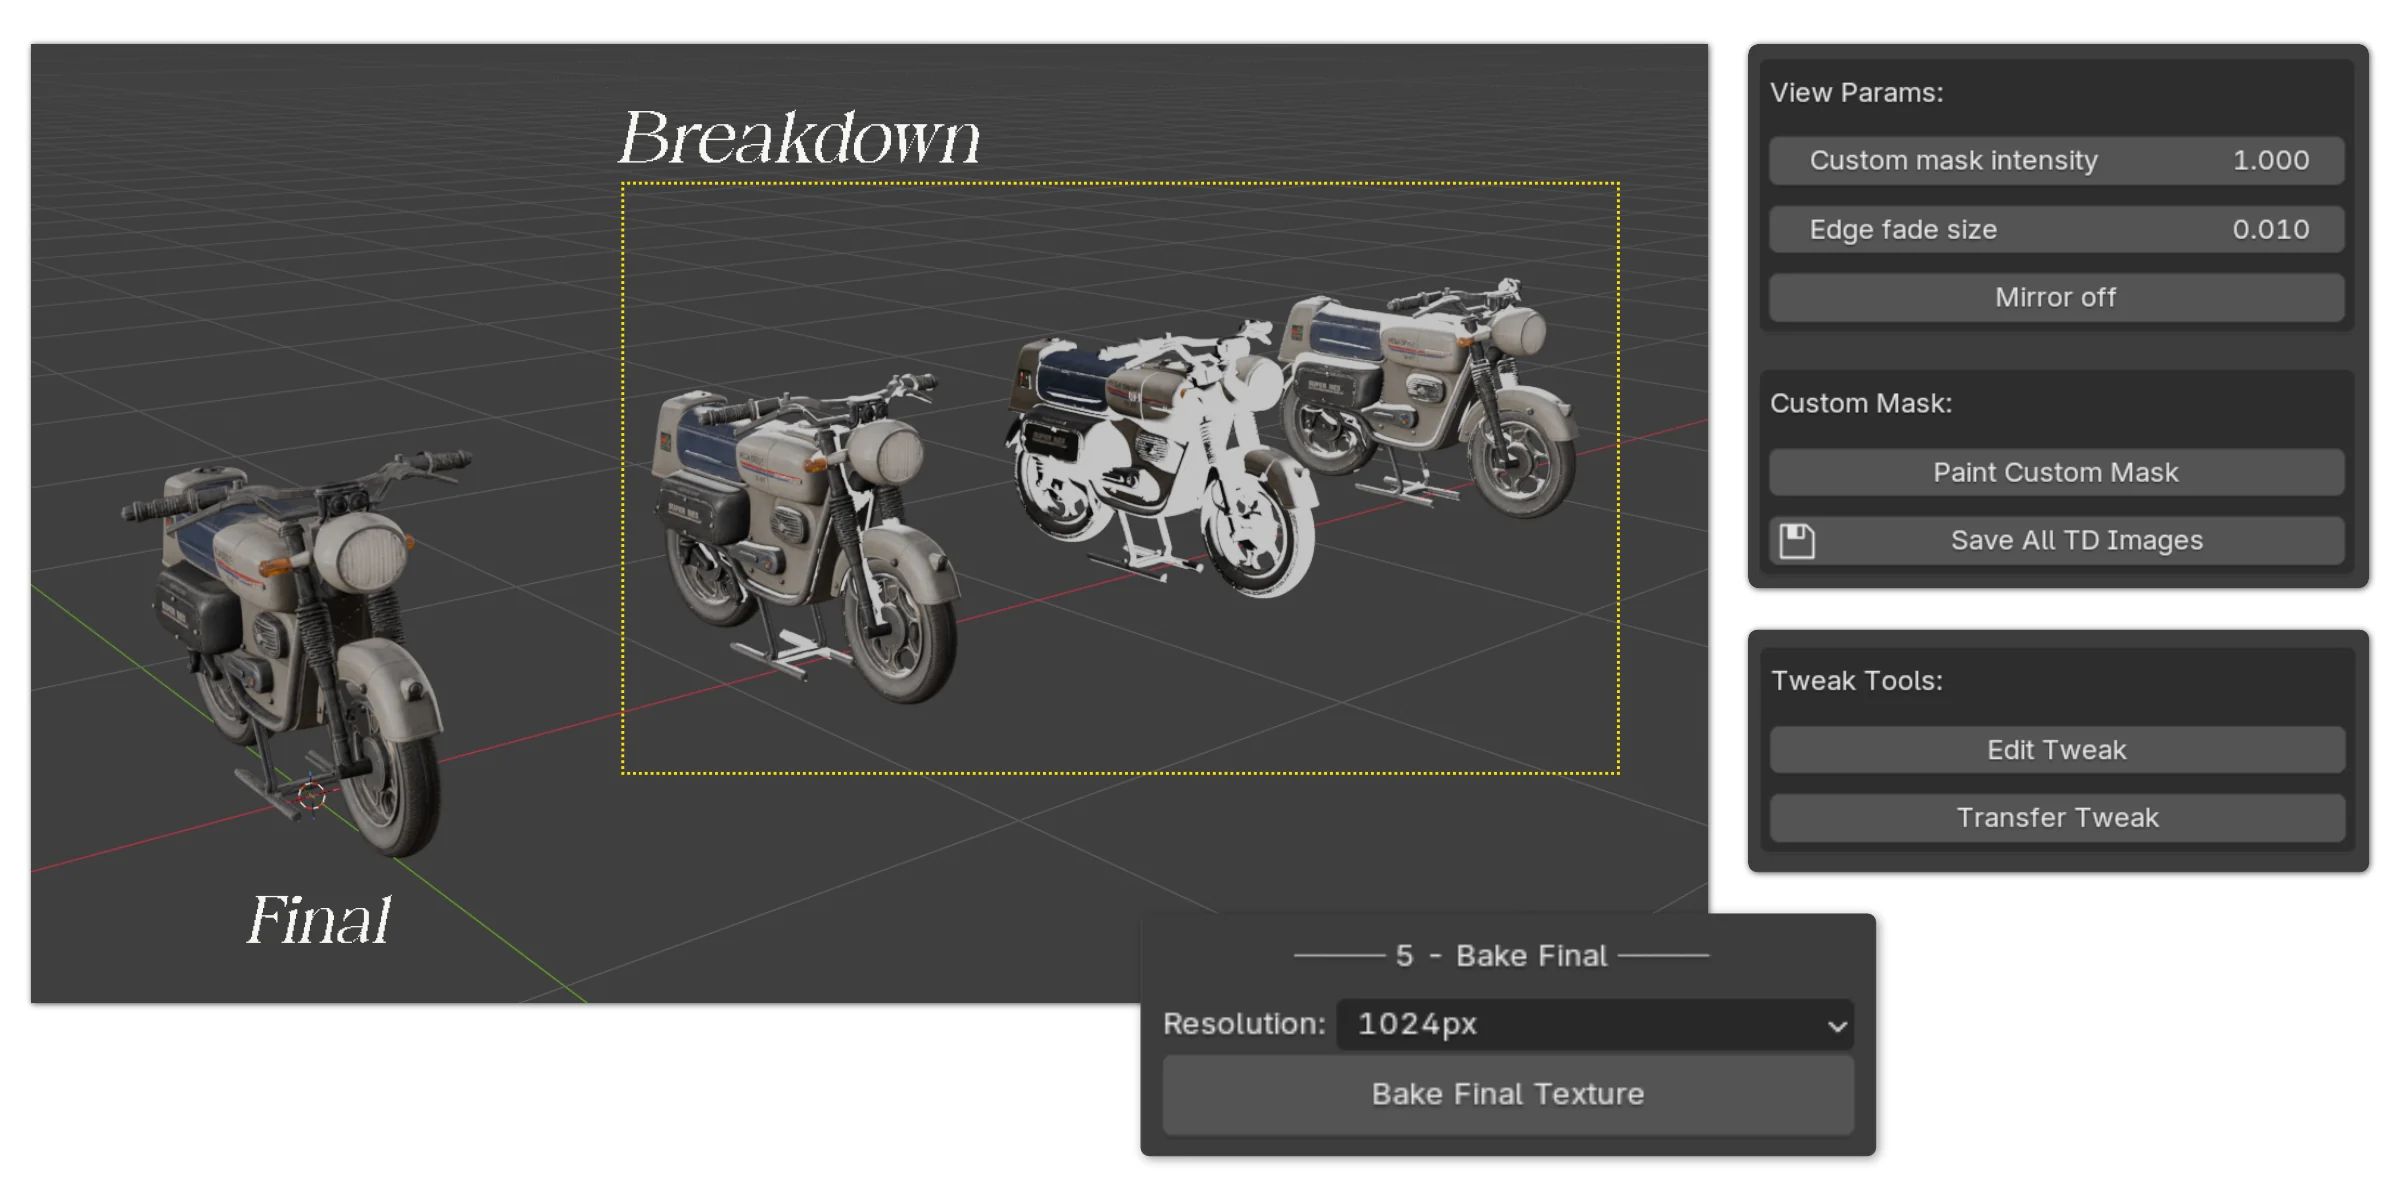
Step 5. Bake the final texture
Pick a resolution and bake.
The addon flattens the combined projections, masks and tweaks into a single image applied on the model’s original UVs. From there it is a normal Blender material: paint on top, edit externally, or send it to your engine.
Part 4 - The two modes together
The two modes are designed to feed each other.
Start with Global Texture to lay down a coherent base across the whole object, then switch back to Live Paint to refine specific zones: add a scar on a face, fix a glitch on a panel, push the detail somewhere the multi-view pass left vague.
The baked texture from Step 5 becomes the canvas of the next Live Paint session.
Part 5 - Quality of life
Cost panel
A compact tracker at the bottom of the tab adds up the cost of every generation made in the current scene, with a reset button.
Three quick links open the billing dashboards of Replicate, fal.ai and Google AI Studio in your browser.

Keyboard shortcuts
Two shortcuts are set up automatically in the 3D View:
- F6 runs the current Generate action, in either workflow.
- F7 toggles the yellow capture overlay.
Limits
Texture Diffusion is not an automatic final-texture button.
- Your model needs UVs.
- The addon generates diffuse/albedo textures, not full PBR materials.
- You need an API key from Replicate, Gemini or fal.ai.
- Each generation is billed by the provider, usually a few cents per image.
- AI results vary.
- You still need taste, cleanup and iteration.
The addon gives you control over the view, prompt, reference images, masks and projection. That is a lot of control compared to a black-box generator, but it does not make the process deterministic.
FAQ and installation
I keep the short FAQ and installation notes on the product pages, because that is where they are most useful when you are about to buy or just downloaded the addon.
For quick answers about UVs, PBR, subscription and provider costs, check the FAQ tab on Superhive.
Buy Texture Diffusion v2
Texture Diffusion v2 is available on Superhive and Gumroad.
Superhive is the best option if you prefer staying in the Blender marketplace ecosystem.
Gumroad is a good option if you came from my site or social posts and want the direct checkout.
About v1
The first version of Texture Diffusion used a local Stable Diffusion setup with ControlNet. It was built around normal maps and multi-angle projection.
v2 is a full rebuild. It now uses cloud image providers, has a cleaner Blender workflow, and adds the two-mode structure: Global Texture for full passes, Live Paint for local projection painting.
The idea is still the same at heart: use the shape of the 3D model to guide image generation, then bring the result back onto the mesh in a way an artist can keep working with.